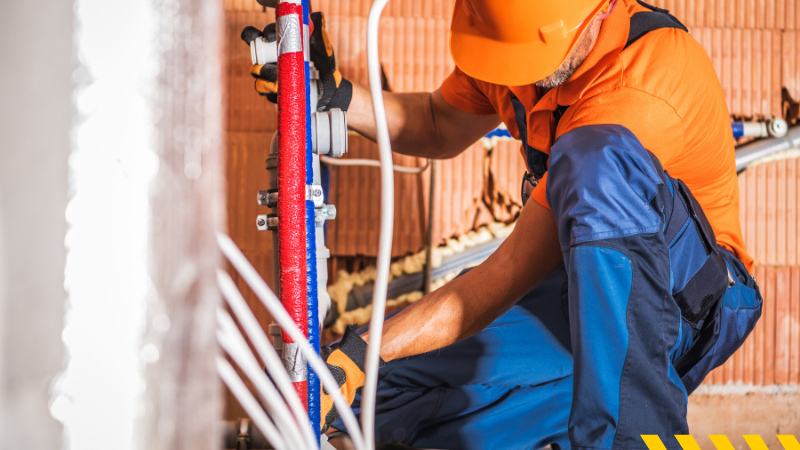
Soldering is a common technique used in plumbing to join pipes together. It involves melting a metal alloy known as solder and using it to create a strong bond between two pieces of metal. This process is essential for creating leak-proof connections and ensuring the proper flow of water through your plumbing system.
In this article, we will guide you through the steps on how to successfully solder plumbing pipes, including the materials and tools needed, safety precautions, and tips for achieving the best results.
Materials Needed for Soldering
For successful soldering, gather essential materials before starting the process. You’ll need copper pipes, lead-free solder, and soldering flux. Flux helps clean the metal surfaces, ensuring a strong bond. A propane torch is required for heating the joint until the solder melts. Safety goggles and gloves are also important to protect yourself from heat and debris.
Before you begin, plan your work area efficiently. Consider hiring Plumbing Estimating Services to assess the project scope and materials needed. This can help avoid unexpected costs and ensure you have everything at hand. Having the right tools will make your soldering task much smoother.
Tools Required for Soldering
Using the right tools is crucial for a successful plumbing project. A propane torch is needed for heating the joint to melt the solder. A small brush helps apply soldering flux evenly on the surfaces to be joined.
Additionally, a pipe cutter is essential for cutting pipes to the desired length. A deburring tool smooths the edges of the pipes after cutting. Finally, a soldering iron can be useful for smaller jobs. Having these tools ready ensures that the soldering process is efficient and minimizes the risk of errors or accidents.
Safety Precautions
When working with hot materials and tools, safety should be a top priority. Always wear safety goggles to protect your eyes from sparks and debris. Gloves are essential for shielding your hands from burns or cuts. Make sure your work area is clear of flammable materials to prevent any accidents.
Stay focused and avoid distractions while soldering. If you’re working in a confined space, ensure there is adequate ventilation. Familiarize yourself with the tools before starting, as proper handling can reduce the risk of injury. Following these guidelines will help create a safe environment for your plumbing soldering tasks.
Preparing the Pipes
Before you begin soldering, it is vital to prepare the pipes properly. Start by cutting the copper pipes to the desired lengths with a pipe cutter. Ensure the ends are smooth and free of burrs using a deburring tool. Clean the surfaces thoroughly to remove any dirt or grease. This will help the solder adhere better.
Next, apply soldering flux to the cleaned ends of the pipes. The flux acts as a cleaning agent and helps the solder flow evenly during the heating process. Proper preparation is essential for creating strong and leak-proof joints in your plumbing system.
Applying Flux
Applying flux is a crucial step in the soldering process. This substance cleans the surfaces of the metal, allowing the solder to bond effectively. It helps remove oxidation on copper pipes, which can hinder the flow of solder. Use a small brush to apply flux evenly on both pipe ends that will be joined. Make sure to cover the areas thoroughly.
After applying the flux, you are ready to heat the joint. Proper application ensures that the solder flows smoothly into the joint. This not only strengthens the connection but also prevents leaks in the plumbing system.
Heating the Joint
Heating the joint is a vital phase in the soldering process. Begin by using the propane torch to apply heat evenly around the area where the two pipes meet. Keep the flame moving to avoid overheating in any one spot. This will ensure that the metal reaches the correct temperature for soldering.
Once the metal is hot enough, touch the solder to the joint. The solder should melt and flow into the space between the pipes. Remove the heat once you see the solder fully spread. Allow the joint to cool naturally, which will create a strong and durable bond.
Adding Solder
To join the pipes effectively, it is crucial to apply the molten metal to the heated joint. Begin by ensuring the joint is hot enough for the solder to melt upon contact. Introduce the solder to the joint by placing it against the space between the pipes. The heat from the metal will cause the solder to flow, filling any gaps and creating a secure connection.
After the solder has adequately melted and filled the joint, remove the heat source. Allow the connection to cool undisturbed. This cooling period solidifies the bond, resulting in a strong, leak-proof union essential for a reliable plumbing system.
Inspecting the Joint
Once the soldering process is complete, it is essential to check the integrity of the connection. Begin by visually inspecting the area where the pipes were joined. Look for any signs of leakage or uneven solder application. A clean, shiny finish indicates a successful joint, while dull or rough spots may need further attention.
After the initial visual check, conduct a water test. Turn on the water supply slowly and monitor for any leaks at the joint. If leaks are detected, it may be necessary to reheat the joint and add more solder to ensure a secure, watertight seal.
Common Mistakes to Avoid
Several frequent errors can occur during the soldering process. One common mistake is insufficient cleaning of pipes before application. This can lead to poor solder adhesion and result in weak joints. It is crucial to ensure the surfaces are free of dust, grease, and oxidation.
Another common issue is overheating the joint. This can cause the copper to become discolored and may even damage the pipes. Additionally, applying too much solder can create an excess mess and may lead to leaks. Learning to recognize and avoid these pitfalls will improve the overall quality of your plumbing work.
To read more articles visit Bloggersplanet
Conclusion
After completing the soldering process, it is important to ensure the strength of the connection. Start by closely examining the area where the pipes are joined. Look for signs of leakage, irregular solder application, and overall finish. A glossy appearance typically indicates a successful bond, while rough spots may require more attention.
Next, perform a practical test by gradually turning on the water supply. Observe the joint for any leaks during this process. If any leaks appear, reheating the joint and applying additional solder may be necessary. This final inspection is crucial for the reliability of your plumbing system.